
Set up automated testing for a Sphinx-based tutorial
When crafting a tutorial, you may want to check that all the steps run smoothly and as expected. You can accomplish this with Spread – a system-wide test distribution that automatically assigns jobs to run tests in GitHub CI workflows. Using Spread, you can create a Spread test that runs through all the steps in your tutorial and outputs any failures that may occur. And with Sphinx-based directives, you can guarantee that your tutorial uses the same commands that Spread is testing.
Note
Creating a Spread test for your tutorial is not required to use the Sphinx starter pack; this is an optional capability.
What you’ll need
What you’ll do
Create a “Hello, world” Spread test called
example_tutorialRun the Spread test locally on your machine using Multipass
Create the Spread test materials
On your local machine, create a new directory called spread_test_example
and change into it. This is the root directory of your example project.
Inside the spread_test_example directory, create the tests directory
using mkdir tests and change into it. This directory can hold materials for multiple
Spread tests.
Under the tests directory, create a new directory example_tutorial
to store the files for a “Hello, world” Spread test. This test consists of two files:
A bash script that echoes “Hello, world” to the terminal.
A
task.yamlfile that contains all the commands you want the Spread test to run.
In spread_test_example/tests/example_tutorial, run this command to create a file
named example_bash_script.sh:
echo -e '#! /usr/bin/bash\n\necho "Hello, world!"' > example_bash_script.sh
Now let’s create a task.yaml file. This file holds all the commands the
user will run in your tutorial.
In spread_test_example/tests/example_tutorial, paste the following contents
into a new file task.yaml:
###########################################
# IMPORTANT
# Comments matter!
# The docs use the wrapping comments as
# markers for including said instructions
# as snippets in the docs.
###########################################
summary: Example tutorial

kill-timeout: 5m

execute: |
  # [docs:make-bash-executable]
  chmod +x example_bash_script.sh
  # [docs:make-bash-executable-end]

  # [docs:execute-bash-script]
  bash example_bash_script.sh
  # [docs:execute-bash-script-end]
The summary section contains a brief description of your tutorial, and
the execute section contains all the commands that your tutorial uses.
The kill-timeout option has a default of 10 minutes and doesn’t need to be
included if your test will complete in that time frame.
By wrapping commands with comments in the form of
# [docs:example-wrapping-command] and # [docs-example-wrapping-command-end],
we can include the exact commands from task.yaml in the tutorial file.
Create the tutorial file
Now we have everything we need to create the tutorial file itself. ReStructuredText (.rst) is used for the tutorial file format; MyST-Markdown can also be used.
In spread_test_example/tests/example_tutorial, create a text file
named example_tutorial.rst. To add a title for your tutorial, copy the
block below to this file.
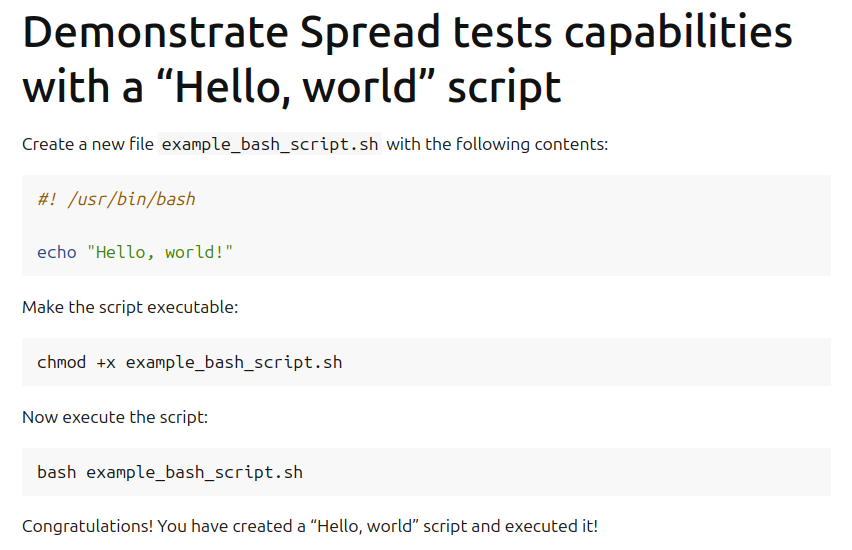
Demonstrate Spread tests capabilities with a "Hello, world" script
==================================================================
In this file, we can use Sphinx’s literalinclude directives
to feed the Spread test materials directly into our tutorial. This way, we guarantee
that the Spread test is testing the exact commands that appear in the tutorial.
Let’s start with the bash script. In the mock tutorial, we want the the reader to
create the file themselves, so let’s use that language in example_tutorial.rst
when we include the script. Add the following text below the title:
Demonstrate Spread tests capabilities with a "Hello, world" script
==================================================================

Create a new file ``example_bash_script.sh`` with the following contents:

.. literalinclude:: example_bash_script.sh
    :language: bash
Here, we specified that the language of the script is bash. Since our
tutorial file and the example bash script are located in the same directory,
we don’t need to specify where the script is located when we use literalinclude.
At the end of the example_tutorial.rst file, insert the two commands that
appear in our task.yaml file, again using the literalinclude directive:
Demonstrate Spread tests capabilities with a "Hello, world" script
==================================================================

Create a new file ``example_bash_script.sh`` with the following contents:

.. literalinclude:: example_bash_script.sh
    :language: bash

  Make the script executable:

.. literalinclude:: task.yaml
    :language: bash
    :start-after: [docs:make-bash-executable]
    :end-before: [docs:make-bash-executable-end]
    :dedent: 2

Now execute the script:

.. literalinclude:: task.yaml
    :language: bash
    :start-after: [docs:execute-bash-script]
    :end-before: [docs:execute-bash-script-end]
    :dedent: 2

Congratulations! You have created a "Hello, world" script and executed it!
If you were to render the tutorial file using Read The Docs, then the page would look like the following:
Create the Spread test
Now let’s create the Spread test file and include our example tutorial. From the
spread_test_example directory, create the file spread.yaml and insert the
following contents:
project: spread_test_example

path: /spread_test_example
Note that the project name matches the main directory’s name,
spread_test_example. The path designates the directory where the Spread
materials exist.
Now we need to tell Spread about the example_tutorial Spread test. Add the
following section to the end of spread.yaml:
project: spread_test_example

path: /spread_test_example

suites:
  tests/:
    summary: example tutorial
    systems:
    - ubuntu-24.04.64
The suites section is how we tell Spread about the various Spread tests in
our project. We tell Spread to look in the tests directory for all Spread tests
(which it will only find one, example_tutorial). We also use the suites
section to tell Spread about the systems we want Spread to test.
For our mock tutorial, we will use Ubuntu 24.04.
Configure the Spread test to use Multipass
Each job in Spread has a backend, or a way to obtain a machine on which to run your Spread test. The Spread repository contains more information on backends like Google or QEMU, but let’s set up Multipass as a backend to run local tests.
Include the following backends section of spread.yaml between the path and
suites sections:
project: spread_test_example

path: /spread_test_example

backends:
  multipass:
    type: adhoc
    allocate: |
      multipass_image=24.04
      instance_name="example-multipass-vm"

      # Launch Multipass VM
      multipass launch --cpus 2 --disk 10G --memory 2G --name "${instance_name}" "${multipass_image}"

      # Enable PasswordAuthentication for root over SSH.
      multipass exec "$instance_name" -- \
        sudo sh -c "echo root:${SPREAD_PASSWORD} | sudo chpasswd"
      multipass exec "$instance_name" -- \
        sudo sh -c \
        "if [ -d /etc/ssh/sshd_config.d/ ]
        then
          echo 'PasswordAuthentication yes' > /etc/ssh/sshd_config.d/10-spread.conf
          echo 'PermitRootLogin yes' >> /etc/ssh/sshd_config.d/10-spread.conf
        else
          sed -i /etc/ssh/sshd_config -E -e 's/^#?PasswordAuthentication.*/PasswordAuthentication yes/' -e 's/^#?PermitRootLogin.*/PermitRootLogin yes/'
        fi"
      multipass exec "$instance_name" -- \
        sudo systemctl restart ssh

      # Get the IP from the instance
      ip=$(multipass info --format csv "$instance_name" | tail -1 | cut -d\, -f3)
      ADDRESS "$ip"

    discard: |
      instance_name="example-multipass-vm"
      multipass delete --purge "${instance_name}"

    systems:
      - ubuntu-24.04-64:
          workers: 1

suites:
  tests/:
    summary: example tutorial
    systems:
    - ubuntu-24.04.64
The backends section contains the following sections:
The backend is designated as
type: adhocas we are explicitly scripting the procedure to allocate and discard the Multipass VM.In the
allocatesection, we define the image and name of the VM, launch the VM, and then set up the proper SSH permissions so that Spread can log in (via root) into the VM and insert the Spread test. We also must tell Spread about the IP address of the Multipass VM and set the environment variableADDRESS.In the
discardsection, we delete the Multipass VM once the Spread test has finished running.
Run the Spread test locally
List all available Spread tests in the code repository:
spread --list
The terminal should respond with a single line representing the
test for example_tutorial:
spread_test_example$ spread --listmultipass:ubuntu-24.04-64:tests/example_tutorialNow let’s run the Spread test for example_tutorial:
spread -vv -debug multipass:ubuntu-24.04-64:tests/example_tutorial
The test can take several minutes to complete. The -vv -debug flags
provide useful debugging information as the test runs.
Validate the Spread test results
The terminal will output various messages about allocating the Multipass VM, connecting to the VM, sending the Spread test to the VM and executing the test. If the test is successful, the terminal will output something similar to the following:
2025-02-04 16:17:10 Successful tasks: 12025-02-04 16:17:10 Aborted tasks: 0Another sign of a successful test is whether the Multipass VM was deleted as expected.
We can check by running multipass list, and if the Spread test was successful
(and you have no other Multipass VMs created at the time), the terminal should
respond with the following:
spread_test_example$ multipass listNo instances found.If the Spread test failed, then the -debug flag will open a shell into the
Multipass VM so that additional debugging can happen. In that case, the terminal
will output something similar to the following:
2025-02-04 16:17:10 Starting shell to debug...2025-02-04 16:17:10 Sending script for multipass:ubuntu-24.04-64 (multipass:ubuntu-24.04-64:tests/example_tutorial):Next steps
Congratulations! You set up the materials needed to run a Spread test locally using Multipass with commands that explicitly appear in a Sphinx-based tutorial. This section provides additional examples of Spread tests: